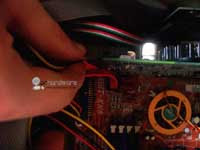
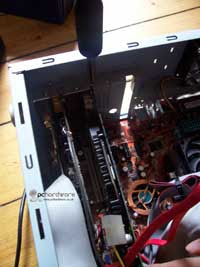
The Graphics Card or Video Card as it is also known allows your Computer to display thousands of colours and images to your display. Some computers have a graphics card built-in to the motherboard this are usually low spec cards and normally use memory from your system (RAM) to run.
The most common reason for a graphics card upgrade is to allow users to run games faster and more smoothly or to add TV/DVI out to your system.
Steps to Install a Graphics Card:
Power down your PC and switch it off at the wall. Remove the screws holding the sides of the case on and carefully slide off both panels.
Wearing an anti-static wristband is preferable whenever working with sensitive electrical equipment. Keeping one hand on a metal part of the case will have the same effect, though you may need both hands when installing certain items of hardware.
If you are replacing an old card, you will need to remove it by loosening the screw holding the backing plate to the case and carefully sliding the card out of the slot. You may also have to undo a clip depending on the design of your motherboard.
Alternatively, you may need to remove the backing plate in front of the AGP or PCI-E slot. Simply remove the screw and slide the backing plate out of the case. For some graphics cards, you may need to remove two adjacent backing plates as the size of the heatsink and fan dictates that the card is double the height of an ordinary expansion card.
Next, remove the new card from its anti-static bag and line the card up with the slot. AGP slots tend to be brown and set back from the PCI slots, whereas PCI-E slots are longer and tend to be black. Push down on the card until it sits firmly within its slot. Push the plastic catch up on the slot to further secure the card.
Secure the backing plate by screwing it firmly to the case. Check that the card cannot move and that the fan on the GPU is clear of obstructions such as floating cables.

Finally, check whether or not your new card requires an additional power source. Some of the more powerful PCI-E cards have a square four-pin power connector slot, so you may need to purchase an additional cable to convert a molex connector if one hasn't been bundled with your graphics card.

Finally, replace the sides of your case and reconnect the cable to your machine.
Boot up your PC and make sure that the POST and Windows splash screens are displayed. This indicates that your card is installed and functioning correctly.
If the display does not show first power down and recheck the card connector as this may of become knocked if yhe system case had been moved.
Once Windows has started, you may be prompted to install drivers for your new card. You may be best cancelling this dialogue and then running the installation program on the driver CD that came with your card. This will install the drivers as well as giving you the option to install other bundled software such as tweaking utilities or DVD playing software.
Once you have installed the new drivers and rebooted, you should be able to reset your desktop resolution by going to the desktop, right clicking, selecting properties and then heading to the Settings tab. You should also visit the manufacturer's website and check for newer drivers, as these will offer optimum performance and iron out glitches with previous driver versions.

Tidak ada komentar:
Posting Komentar